 |
BRAKE UPGRADE TIME - WE HAVE OPINIONS !
What we recommend:
Well actually what we really recommend is you follow this link: HI-SPEC BRAKES to go straight to our online shop and buy a set of the amazing Hi-Spec front brakes. Really though, I expect you want to know why ! Read on then ...
Ah, Ford Capri brakes, (well all the older Ford brakes actually) everybody complains about them and everybody has an idea about what works to improve them. Well let me tell you first off, they are nowhere near as bad as the reputation suggests. Actually, that assumes they are in good order, and don't have the usual old age problems of seizing pistons, leaky seals, warped and scored discs and more. Lets face it though, they are based on 1960's components and the world has moved on. So, if you're not restoring to original specs, what you really want to hear, is how to make them much better, just like your other modern car.
We've been playing with old Fords' brakes, and in particular the Capri's, and let me tell you it is a minefield of bigger discs, princess calipers, Volvo calipers, 4-pot calipers, Granada calipers, 1 pot floaters, aluminium this and that, vented, drilled, grooved and who knows what else discs, fast road or race pads, brackets, rear disc conversions, bigger master cylinders, different servos and a million and one problems and incompatibility issues. Well, we can cut right through that little lot and tell you what we've found that really does make your car stop, is easy to fit, won't leave you feeling you need to change something else to get it to work right, looks good, won't fall apart if used all day every day and won't set your bank manager after you with a lynch mob. I'll tell you why, and I'll even show you a photo shot on how to fit the things.
If you've got a manufacturer in mind, or a supplier or particular setup in mind, we've almost certainly tried it, fitted it, fixed it when it's gone wrong, or diagnosed issues with it. We are intimate with brakes here, and from this huge mountain of hardware, time and again it boils down to the fact that we prefer Hi-Spec brake kits. What we have also found is that of all the components you can change it is the size of the front discs that have the most effect - bigger is better ! If you have 15" wheels use this by buying much bigger diameter discs in your kit. Moreover, we simply like the front upgrade kit on it's own. We find this works perfectly with your standard back brakes and the standard master cylinders and servos (although of these we'd plump for the 2.8i ones every time). 'What, no rear disc conversion?' I hear you shout. No, no, no we say. The fact of the matter is, that weight transfer during braking means that the back can only do so much (say 20%) of the work before they skid and lock. The fronts on the other hand can handle a doubling of force before that happens (at least in the dry). So throw you money at the fronts. In fact, Ford fitted a limiter to the back brakes themselves, on the 2.8i, as they felt they were already close to being over-powerful. Why upgrade them then. Next I hear cries for bigger bore master cylinders and fitment of 2.0 servos that this requires. This is only ever needed if you do fit rear discs. So if you follow our advice about rear discs, then you won't need to monkey around with servos and master cylinders. If you want the best servo and master cylinder that will fit properly then use what Ford did on the newest and fastest models - use the 2.8i stuff. Also note that the 2.0 servo is not as powerful as the 2.8i one, so upgrading to a big bore master cylinder that requires one means downgrading the servo. Other problems we find with rear discs (and I think we've fitted 5 different brands altogether and they all suffer with one or more of these problems), are groaning noises, seriously crap handbrakes, axle oil leaking past wheel bearings where bracketry causes the bearing to not butt into the axle case fully, excessive pedal travel (hence need for bigger master cylinder) and wheels hitting arches, due to extra track width of outboard discs, awkward handbrake cable routing (touching suspension parts).
If you can accept that all you really need to do is upgrade the front brakes (and I urge you to believe this) then you might ask why we go for the Hi-Spec kits and not for any of the others. Well don't get me wrong, there are plenty of others out there that work, but Hi-Spec we believe tick all the boxes, where others might miss one or two. Here's what you get in the 285mm kit for use with 15" wheels (we have kits for 13" wheels too, but the bigger 15" kits work best - there is no substitute for size!).
The Kit - what's in it?
The calipers are beautiful lightweight aluminium - less weight is very good.
The calipers are fine for road use and have a full set of dust seals - some brands don't.
They come with a choice EBC pads - these work well right from cold, and don't fade when hot - some brands only work well hot.
They are easy to fit (see the pictorial lower down).
The mounting brackets are one piece CNC machined aluminium - there are no weedy bits of crudely fashioned steel suspended on the end of piles of washers here.
There is no machining to be done to anything - it all just bolts right on.
The discs fit on the back of the hubs exactly as the originals do - this means they don't push your wheels out, they don't need longer studs, your wheels won't suddenly be hitting your arches, and you will not have to have your hubs machined down to make them fit, thus ruining the hubs if you want to go back.
The calipers bolt to the inside of the suspension leg, in the stock position - this means they won't suddenly be hitting the inside of your wheels, it also means that the caliper will be straight in relation to the disc - unlike calipers that bolt to the outside of the leg (i.e. the side that isn't even machined flat for this !).
The pad for the Hi-Spec caliper is a standard Volvo shaped pad - these can be obtained all over the place.
The price is right - from £575+vat for the full 283mm kit here.
Fitting the kit:
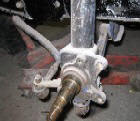
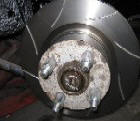
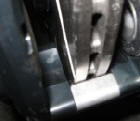
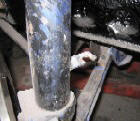
So, just how easy are these blighters to fit then? Well, we'll assume you can work on your car and have a few tools, and maybe a little common sense. If not, don't fear, you can always book it in with us. We'd want just 2 hours labour to this job. First up is to remove the old calipers, then the hub with the old disc. If you've got backing plates on your brakes, then take 'em off, they are not used with vented discs (2.8i didn't have any). Should look like picture 1.
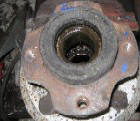
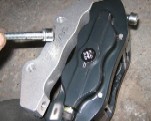
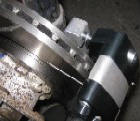
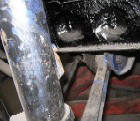
Next up flip your hubs over, bend the lock tabs back on the 4 bolts, undo the bolts and remove the old discs - rubber mallet if you need to hit anything. You should be left with something like picture number 2.
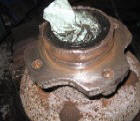
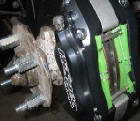
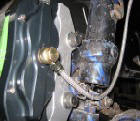
The next bit is extremely important and must not be overlooked. Get ALL the dirt and rust of the old hubs' disc mounting faces - use sandpaper or wire brush on a grinder. Any debris left can make the new discs run as if they are warped - do it and do it again - pic 3.
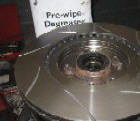
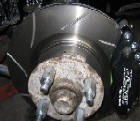
New discs can be put on the hubs now and should drop all the way down to the mounting face evenly. If not, find out why and rectify (probably rust round the centre spigot). You can then put the bolts and lock tabs back and fasten up - pic 4. Hubs can go back on stub axles now. Just tighten the centre nut enough so the hub spins freely, but you can feel no play if you try to rock the discs in and out - pic 5.
Now we can get the calipers fitted to their brackets. This is easy as only 1 of the 2 types of bolts and spring washers supplied will fit, so simply secure brackets to calipers as in picture 6. The bracket has the nice Hi-Spec logo engraved on one side. So face that inwards, if you want to be able to ever see it ! NOTE - bleed nipples go at top of calipers - they're handed.
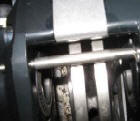
Now hold the caliper over the disc and press tight up against the suspension leg in the position it should be in when finally fitted. Have a look at the disc and see if it is central in relation to the aluminium spacer in the middle of the caliper. See pic 7. It won't be, but from this you should be able to judge the size of the spacer washer (2 sizes in the kit) to use to centralise things. These go between the suspension leg and the caliper. The leftovers, can then be used under the heads of the bolts, which you can now fit the calipers on with - pic 8.
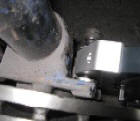
Final check to make on disc and caliper is the clearance between the outside edge of the disc and the inside of the caliper, see pic 9. It usually is quite tight or even touching. Fear not, the kit includes a spacer washer to go between the caliper and the mounting bracket, see pic 10. Install these if needed, tighten up and be sure everything rotates smoothly with no tight spots or contacts.
Now you can slide the pads into place, noting that they come pre-fitted with anti squeal pads and a break-in treatment on the faces. Pin and lock pin fitting should be pretty obvious and there are anti-rattle springs included. Picture 11 shows that lot fitted correctly. Give it all another rotation check - should be fine if you got all the spacers in the right places. You should now be looking at something like picture 12.
Last thing to do is hook the calipers into the brake lines. For this the kit comes with a nice pair of stainless steel braided flex hoses. Main thing to note here is that this hose is long and is designed to go from the caliper all the way to the inner wing. This means it replaces both the old rubber hose and the short metal pipe, that is normally linked from the caliper to the bracket on the leg (pic 13). We normally bend this bracket up out of the way (pic 14) so it can't snag the new line. The new line is installed with a banjo fitting and 2 copper crush washers as per picture 15. This picture also shows what we have found to be the ideal route for the hose. Just check that nothing fouls, by rotating the steering from lock to lock.
All you need to do now is bleed the calipers - note there are 2 nipples - bleed both.
Fit your wheels, test drive, enjoy and feel smug you've got great brakes and did a great job fitting them !
Get yours now !


